Free guide · last checked October 2026
By David Silva · davidslv.photography/guides/sell-your-photo-book
Sell your photo book from your own website
This is how I sell It Started on a Sunday: a hardcover printed only when someone orders it and posted straight to them. No shop platform, no monthly fee, no stock at home. Everything I used is here, step by step, for people who have never written code.
Want it offline or printed? The same guide is a PDF on Gumroad, pay what you like from £4.99. The web page stays free.
1. How it works
Four parts:
- Website. A page about your book with a Buy button. I host mine free on GitHub Pages. Any website works, and Route A works without one.
- Checkout. A Stripe Payment Link: a checkout page Stripe hosts for you. It takes the card payment and the delivery address.
- The link between them. Route A: you. Route B: a small Cloudflare Worker that is told about each payment and places the print order.
- Print on demand. Prodigi prints the book and posts it to your buyer.
Which route? Start with Route A. It takes an afternoon and costs nothing up front. Move to Route B when copying addresses by hand gets tiring, or if you want orders placed while you sleep.
Other print companies (Blurb, Lulu, Peecho and others) work too. I chose Prodigi for A4 landscape hardcovers with a good paper. The steps here use Prodigi and Stripe because those are the ones I've tested.
2. Before you start
Your book file
Prodigi's rules for a photo book, as one PDF:
- Page 1 is the front cover. The last page is the back cover. Everything between is the inside of the book.
- Every page is the size of the book. For A4 landscape that's 297 × 210 mm. No bleed and no crop marks: Prodigi adds the bleed.
- An even number of pages. Prodigi's product page shows the smallest and largest page count for your book.
- Keep text and faces at least 10 mm from every edge.
- Photos at 300 ppi at the size they print. RGB is fine. Fonts embedded.
InDesign, Affinity Publisher, Lightroom's Book module (exported as PDF) and Canva can all make this. Check the current specs on the product's page in Prodigi before you export, in case they've changed.
Accounts
| Account | Route A | Route B | Cost |
|---|---|---|---|
| Stripe (stripe.com) | yes | yes | Free. A fee per sale. |
| Prodigi (prodigi.com) with a card added | yes | yes | Free. You pay per book printed. |
| Cloudflare (cloudflare.com) | yes | Free plan. R2 storage asks for a card, but 10 GB is free. | |
| A website | optional | optional | GitHub Pages is free. A domain is about £10 a year. |
Stripe asks for ID and your bank details before it pays you out. In the UK you can sign up as an individual (sole trader). Allow a day for checks.
Words you'll meet
- SKU: the product code for your book at the printer.
- Payment Link: a checkout page Stripe makes for one product. You share its address.
- Test mode / sandbox: a practice copy of Stripe or Prodigi. Nothing is charged or printed.
- API key: a password that lets one service act on your account.
- Webhook: a message Stripe sends to a web address when something happens, such as a payment.
- Worker: a small program that runs on Cloudflare and answers those messages.
- Bucket: a folder in Cloudflare's private file storage (R2).
- Binding: the setting that tells the Worker which bucket to read.
- Secret: a setting Cloudflare stores encrypted, for keys and passwords.
3. Set your price
Work it out once, on paper. You need the printing price first: do A1 steps 1 to 5 to see it.
Printing (Prodigi's price for your page count)P
Prodigi's delivery to your buyerD
Stripe fee: 1.5% + 20p for a standard UK cardF
What you want to keepK
Book price + delivery charge you setP + D + F + K
Example with made-up numbers: printing £30.00, delivery £6.00, and you want to keep £8.00. That's £44.00 before the fee. Price £45.00 with free delivery, or £39.00 + £6.00 delivery. The fee on £45.00 is about 88p, so you keep about £8.12.
- Get real numbers. In Prodigi, set up your book (section 5, A1) and look at the price it shows for your page count and your buyer's country.
- Premium UK cards (many reward and business cards) cost 2.8% + 20p, and cards from outside the UK cost more. Leave room for that, and check Stripe's pricing page.
- If you're not VAT registered, don't add VAT. You only need to register when your turnover goes over the VAT threshold (£90,000 a year).
- Delivery to other countries costs more, and some countries charge import tax. Start with your own country.
4. Order a proof copy
Order one copy for yourself before you sell anything. Prints look darker than your screen, and text near the edge can get cut. Order it the same way your buyers' copies will be made (section 5, A1), check every page, fix the file, and order another proof if you changed a lot.
5. Route A: no code, you place each order
Buyer pays on Stripe. Stripe emails you. You copy their address into Prodigi and order the book. About five minutes per order.
A1. Set up the book in Prodigi
- Sign in to the Prodigi dashboard. Add a payment card in the billing settings.
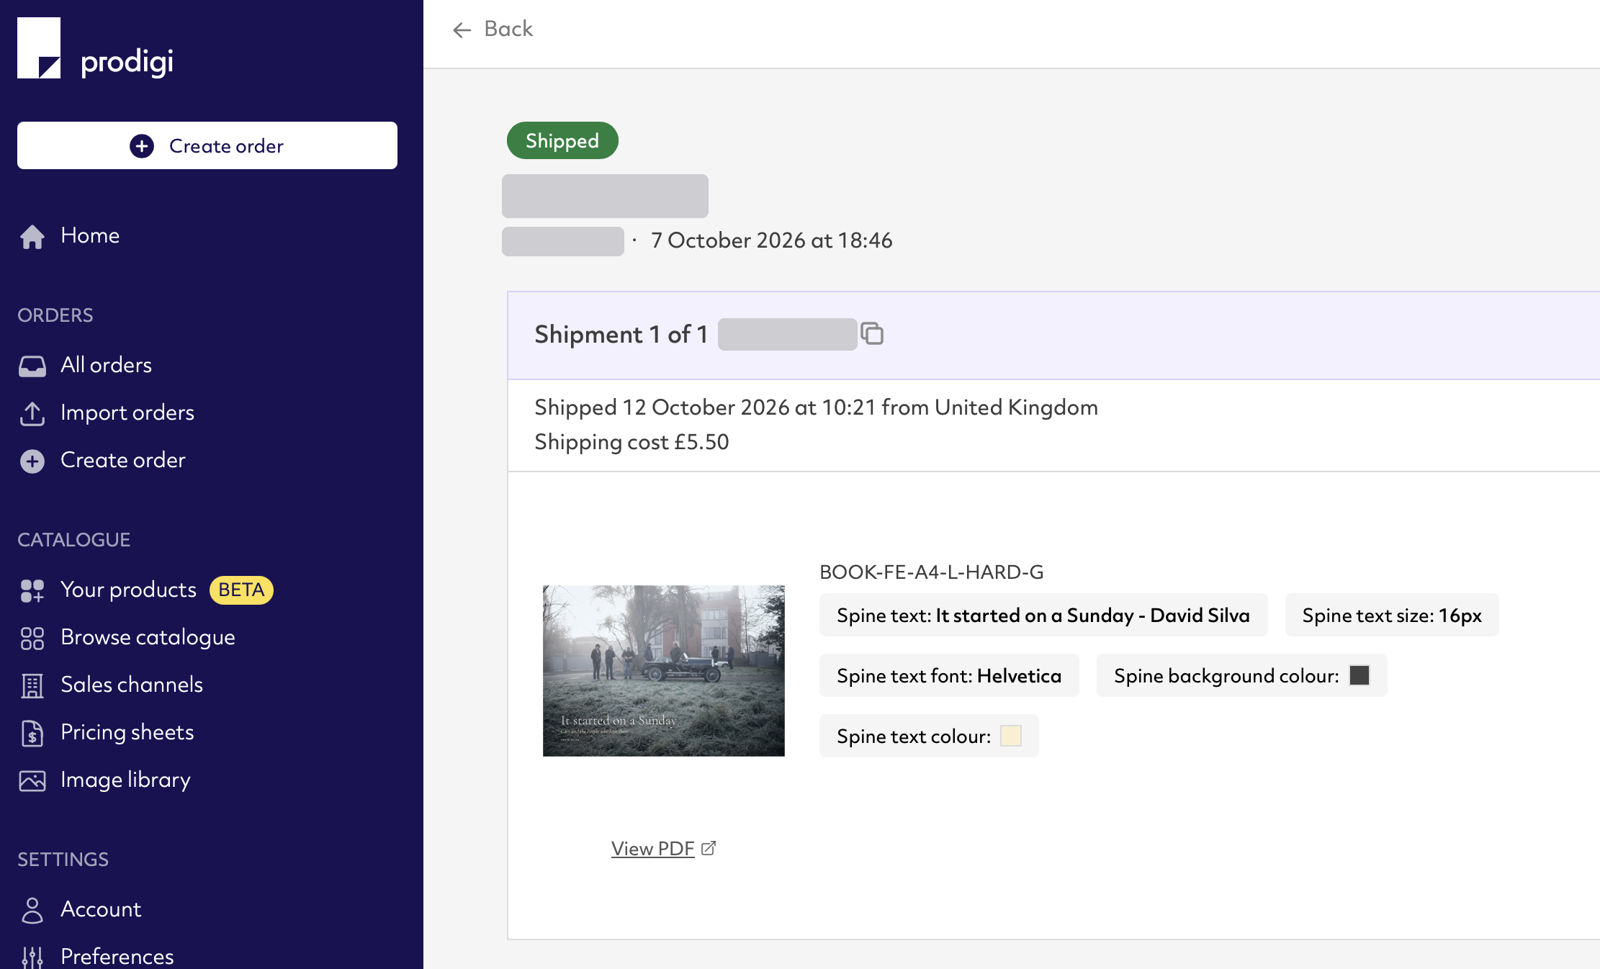
- Start a new order and choose the photo book you want (size, hardcover or softcover, paper).
- Upload your PDF. Prodigi checks the page count and size.
- Type the spine text, and pick its colour and the spine colour.
- Note the price it shows. Use it in your price sum (section 3).
- Save the book as a product (or save the order details) so you can reuse it for each order.
- Put in your own address and order this one as your proof.
A2. Make the Stripe Payment Link
- In Stripe, go to Product catalogue and add a product: your book's name, a photo of the cover, a one-time price.
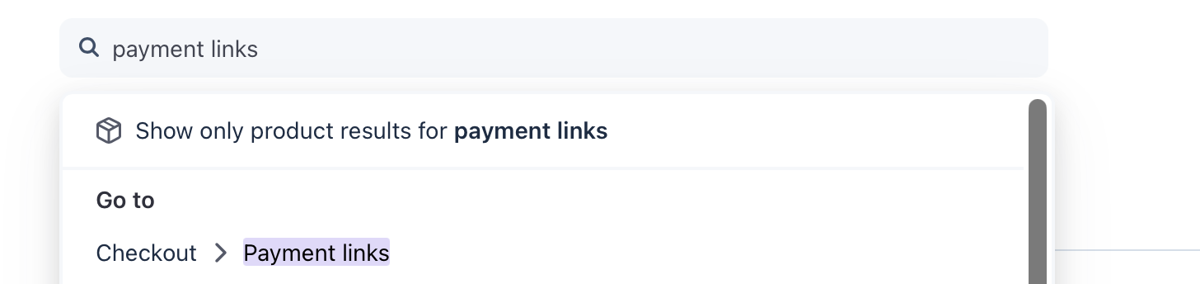
- Search the dashboard for payment links. It's under Checkout, Payment links. Click Create payment link and choose your product.
- Turn on Collect customer addresses, choose Billing and shipping addresses, and allow only the countries you deliver to.
- Add a shipping rate with your delivery price and the delivery time (Prodigi's time plus a few days).
- Turn on Require customers to provide a phone number. Couriers sometimes need it.
- Turn on Require customers to accept your terms of service. Stripe asks for your terms page address first: Settings, Business, Public details, Terms of service. What goes on it is in section 7. No website? Make a free page on Google Sites or Notion, publish it, and use its address.
- Optional: add a custom field, a dropdown asking "Send me news about new books?" with Yes and No. Only email people who said yes.
- Create the link. Copy it. That's your Buy button.
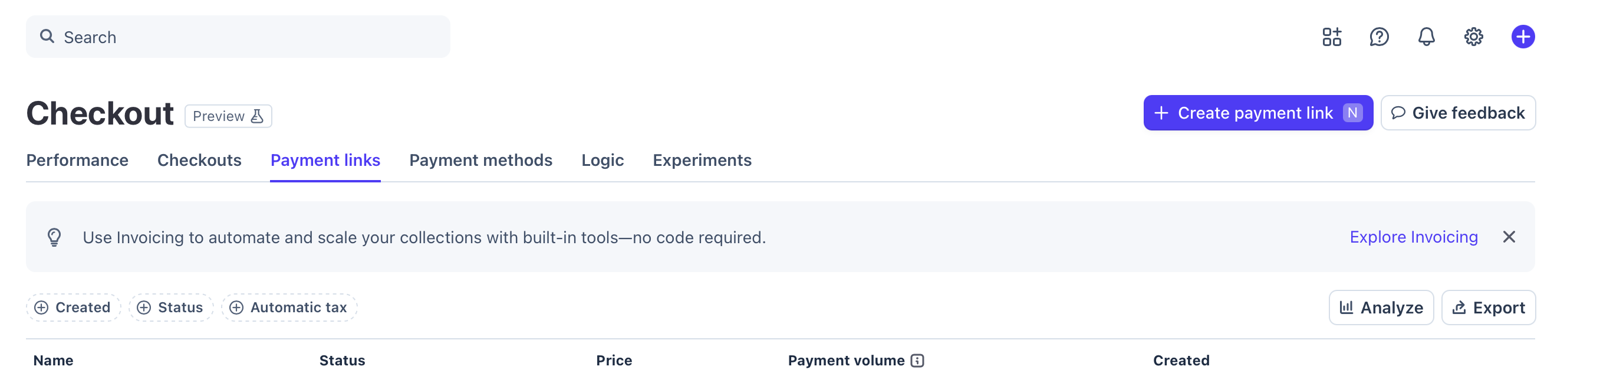
Stripe moves menus around now and then. If a name here doesn't match, search for it in the dashboard's search bar.
A3. Put the Buy button on your website
Make a button or a plain link that opens the Payment Link (the address starting https://buy.stripe.com/). In Squarespace, Wix or WordPress, add a button block and paste the link. No website yet? Put the link in your Instagram bio or your email signature. It works on its own.
A4. Test it
- Turn on emails for successful payments in Stripe's notification settings (search the dashboard for "communication preferences").
- Switch Stripe to test mode (or a sandbox). Test mode has its own product catalogue, so add the product again, then make the same Payment Link there.
- Buy with the test card
4242 4242 4242 4242, any future expiry date, any 3 digits. - Check you get the payment email, and that the address and phone show on the payment in Stripe.
A5. Each time someone buys
- Stripe emails you about the payment. Open the payment in the Stripe dashboard.
- In Prodigi, start a new order with your saved book, and copy in the buyer's name, address, phone and email exactly as Stripe shows them.
- If the order form has a reference field, paste the Stripe payment ID there (it starts with
pi_and is on the payment's page in Stripe), so you can match them later. Otherwise write down both order numbers. - Submit. Prodigi charges your card and prints.
Do it the same day if you can. Your delivery time starts when the buyer pays.
6. Route B: automatic orders
Same Payment Link as Route A. The difference: when someone pays, Stripe sends a message to a small program on Cloudflare, called a Worker. The Worker checks the message is real, asks Stripe for the address, and places the Prodigi order. You do nothing.
You'll copy and paste one file of code. You don't need to understand it. It's about 150 lines and most parts have a comment in plain English. Download the Worker code. Don't double-click the file. Right-click it and open it with TextEdit (Mac) or Notepad (Windows), then press Cmd+A or Ctrl+A to select everything, and copy.
Do every step below in test mode first: Stripe's test mode and Prodigi's sandbox. Nothing gets printed or charged. Switch to live only at B8.
B1. Make a Prodigi sandbox key
- Prodigi has a separate sandbox dashboard for testing:
sandbox-beta-dashboard.pwinty.com. Signing up on Prodigi's normal dashboard sets up both. If you can't log in to the sandbox, ask Prodigi's support. - In the sandbox dashboard, find the API key in the settings (look for API or Integrations). Copy it into a password manager (for example Apple Passwords, Bitwarden or 1Password).
- Note the product code (SKU) for your book. It's on the product's page in Prodigi, and looks like
BOOK-FE-A4-L-HARD-G.
B2. Put your book file in private storage
- In Cloudflare, open R2 Object Storage. Turn it on (it asks for a card; up to 10 GB is free).
- Create bucket. Give it any name. Leave public access off.
- Upload your book PDF. Give it a simple name with no spaces, like
book.pdf. - A spine file. Route B doesn't use the spine text you typed in A1. Without a spine file, buyers get a plain spine that doesn't match your proof. To get text on it, ask Prodigi's support for the spine width at your page count, make a PDF that wide by 210 mm tall in the app you made the book in, and upload it as
spine.pdf.
A 160-page A4 book at 300 ppi is usually around 200 MB, and the dashboard upload took mine. If the upload fails for a bigger file, export the PDF again with a lower JPEG quality.
B3. Create the Worker
- In Cloudflare, go to Workers & Pages, Create, and start from the "Hello World" Worker. Name it, for example
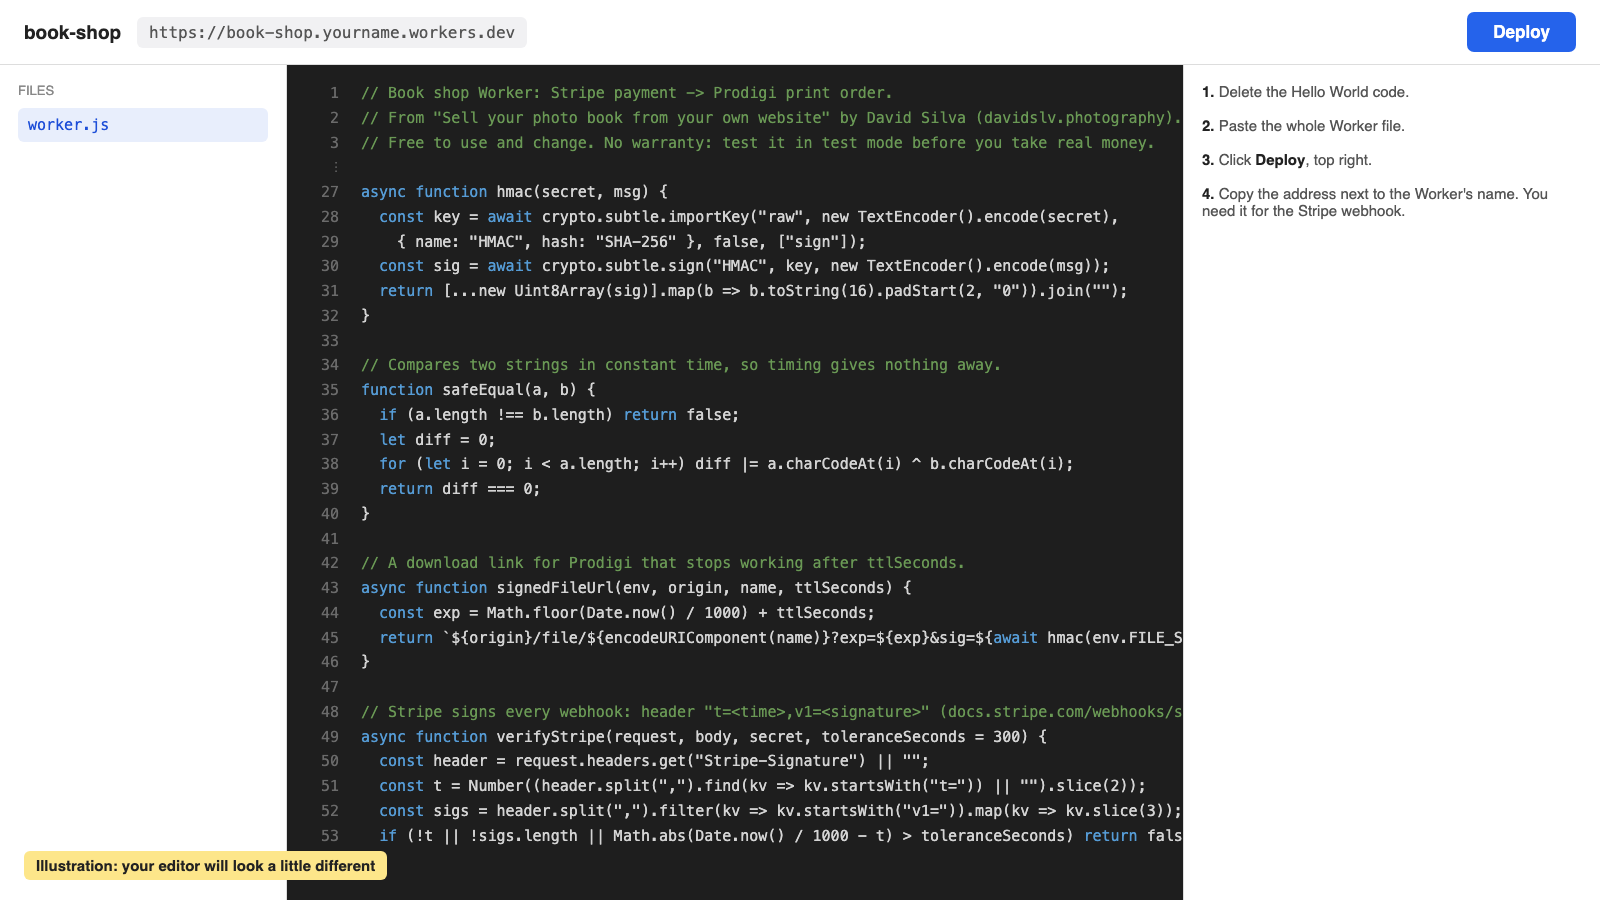
book-shop. Deploy. - Click Edit code. Delete everything in the editor. Paste the whole Worker file. Click Deploy.
- Note your Worker's address. It ends in
.workers.dev.
B4. Connect the storage
- In the Worker, open Settings, then Bindings, Add, R2 bucket.
- Variable name:
BOOK(capitals). Bucket: the one from B2. Save.
B5. Make the Stripe keys
Still in Stripe's test mode:
- Go to Developers, API keys, Create restricted key. Give it two permissions only: Checkout Sessions: Read and PaymentIntents: Write. Everything else stays None. Copy the key (starts
rk_test_). - Go to Webhooks and click Create an event destination. Choose Your account, then the Snapshot payload. Not Thin, even though Stripe marks Thin as recommended: the Worker only understands Snapshot.
- Tick two events:
checkout.session.completedandcheckout.session.async_payment_succeeded. - Choose Webhook endpoint. URL: your Worker address followed by
/stripe-webhook, for examplehttps://book-shop.yourname.workers.dev/stripe-webhook. - If Stripe asks for an API version, leave the one it picks.
- Save, then reveal the signing secret (starts
whsec_) and copy it. - Open your test Payment Link in the Stripe dashboard and copy its ID from the address bar (starts
plink_).
A restricted key can only do what you ticked. If it leaks, it can't issue refunds or payouts, but it can read your buyers' names and addresses. Delete it in Stripe straight away and make a new one. Never paste any key into the code itself, a website or a chat.
B6. Fill in the Worker's settings
In the Worker, open Settings, Variables and Secrets. Add each one below. Choose Secret for the first four, so they're stored encrypted and hidden even from you.
| Name | Type | Value |
|---|---|---|
STRIPE_SECRET_KEY | Secret | the restricted key from B5 |
STRIPE_WEBHOOK_SECRET | Secret | the whsec_ signing secret |
PRODIGI_API_KEY | Secret | the sandbox key from B1 |
FILE_SECRET | Secret | a long random password (40+ characters) from a password manager |
PRODIGI_BASE | Text | https://api.sandbox.prodigi.com/v4.0 |
PRODIGI_SKU | Text | your book's product code |
PAGE_COUNT | Text | the number of pages in your PDF file, front and back cover included (mine is 164) |
BOOK_FILE | Text | book.pdf (the name in R2) |
SPINE_FILE | Text | optional: spine.pdf |
PAYMENT_LINK_ID | Text | the plink_ ID from B5. Required: without it, no order prints, so a sale of anything else on your Stripe account can never print a book. |
SHIPPING_METHOD | Text | optional: Budget, Standard, StandardPlus, Express or Overnight. Default Standard. |
Deploy again after saving, if the dashboard asks.
B7. Test it end to end
- Open your test Payment Link and buy with
4242 4242 4242 4242. Use a real-looking address in your delivery country. - In Stripe, open Webhooks and your destination. The delivery should show 200, which means it worked.
- In Prodigi's sandbox dashboard, the order should be there with the buyer's address and no issues.
- Back in Stripe, the payment should show
prodigi_orderin its metadata. - From the webhook page, resend the same event. Prodigi should still have one order, not two.
If it fails, the webhook page shows the answer the Worker gave:
- 400 bad signature: the
whsec_secret is wrong, or it's from a different endpoint or mode. - 500: open the Worker's Logs in Cloudflare. The line starting
FAILEDsays why. If Logs is empty, turn on logs in the Worker's Settings (Observability), then resend the event. Usual causes: a key from the wrong mode, a wrong SKU or page count, or the R2 binding not namedBOOK. - 200 "not the book":
PAYMENT_LINK_IDdoesn't match the link you bought from. - 200 "ignored": the webhook sends the wrong events, or uses the Thin payload. Make a new destination with Snapshot (B5).
- 200 "waiting for payment": the payment hasn't cleared yet (some bank payments take a few days). The order is placed when it does.
B8. Go live
- Switch Stripe to live mode. Use the live Payment Link you made in A2. Make a live restricted key (
rk_live_) and a live webhook destination exactly as in test mode (B5). - Get your live Prodigi API key from the normal dashboard (not the sandbox), with your card added.
- In the Worker, replace three secrets with the live ones:
STRIPE_SECRET_KEY,STRIPE_WEBHOOK_SECRETandPRODIGI_API_KEY.FILE_SECRETstays the same. ChangePRODIGI_BASEtohttps://api.prodigi.com/v4.0. Open your live Payment Link in Stripe and copy itsplink_ID from the address bar intoPAYMENT_LINK_ID. Not the buy.stripe.com address. - Put the live Payment Link on your website.
- Buy one copy yourself with a real card. That's your final test, and the book shows you the spine buyers will get.
- From now on, don't place orders in Prodigi by hand. The Worker does it. Stripe's payment emails still arrive, for your records.
If the Worker or Prodigi is down when someone pays, the payment still goes through. In live mode Stripe resends the message for up to 3 days and emails you if it keeps failing (in test mode it only tries a few times). The order can't be printed twice.
Prodigi downloads your files after it accepts an order. If a download fails, the order shows an issue in Prodigi's dashboard rather than in Stripe. Keep Prodigi's emails switched on and look at new orders now and then.
7. The legal minimum (UK)
This is what I did, not legal advice. Check gov.uk for your own case.
- A terms page. Before someone buys, they must see who you are, a geographical address (a business or virtual office address is fine if you'd rather not publish your home), an email, the total price with delivery, delivery times and their right to cancel. My terms page is an example you can read.
- 14 days to cancel. Buyers of a printed book can cancel for any reason within 14 days, starting the day after delivery. You refund the book and the standard delivery within 14 days of getting it back, or of proof they've sent it.
- Faulty items. A damaged or misprinted book gets a refund or replacement. Ask Prodigi's support about misprints and damage in transit, with photos and the order number.
- Tax. Tell HMRC you're self-employed if your sales, before costs, go over £1,000 in a tax year. VAT only after your turnover passes £90,000 a year.
- Customer data. Use buyers' details to deliver their order. Say on your terms page what you collect and that the printer gets the delivery address. Email them news only if they said yes. The ICO's website has a quick check on whether you need to pay its data protection fee.
8. When something goes wrong
- A book hasn't arrived. Check the order in Prodigi for tracking. If it's lost, ask Prodigi to reprint. Tell the buyer what's happening the same day.
- A book arrived damaged. Ask the buyer for photos of the book and the packaging. Send them to Prodigi's support with the order number.
- Payment came in but no print order (Route B). Check Stripe's webhook page and the Worker's logs. Once the problem is fixed, resend the event from Stripe. It can't print twice.
- A refund. Refund from the payment page in Stripe. If the book hasn't been printed yet, cancel the order in Prodigi first.
Questions
I can't set things up for you, but if a step here is wrong or out of date, tell me at hello@davidslv.photography and I'll fix the guide.
And if you'd like to see what this setup sells: It Started on a Sunday, 72 photographs of car meets in and around London, and the people who love the cars.